eSIM APN Settings: Fix No Data Abroad and Copy the Right Values

Most eSIM profiles provision their APN automatically, so you usually don’t need to touch any settings at all. If you have signal but no data, the fastest fix is to confirm the active eSIM line is selected for mobile data, turn on data roaming if you’re traveling, and check your provider’s APN string against what’s actually entered on your device.
TL;DR:
- Android may require manual APN entry when a smaller provider does not embed settings; select the saved entry as active or data will not route.
- If iPhone lacks Cellular Data Network, the carrier has locked editing; request its official configuration profile or contact support instead of forcing an entry.
- Compare the APN character by character, then try IPv4 only if IPv4/IPv6 fails; reset network settings only after simpler checks fail.
- Hotspot trouble may need a separate tethering APN or dun in APN Type, while MMS requires its own messaging fields.
Table of Contents
- What an APN is and why it matters for your eSIM
- iPhone: how to view, install, or enter APN settings
- Android: where to find and edit APN on Pixel and Samsung
- When you’ll actually need to enter an APN manually
- Quick troubleshooting checklist for signal with no data
- APN field reference and example values you can copy
- How to verify APN settings on a Lumo eSIM plan
- Switching APN settings between regional Lumo eSIM profiles
- Backing up and restoring APN settings across devices
- What frequent travelers get wrong about APN settings
- Simplify your setup with Lumo eSIM plans
- FAQ
- Sources
What an APN is and why it matters for your eSIM
An APN, or Access Point Name, is the setting that tells your phone how to reach your carrier’s data gateway and get online. Without a correct APN, your device can show full signal bars while sending zero data anywhere.
Many eSIM profiles carry the APN inside the profile itself, so the setting loads the moment you activate. Apple documents that iPhones receive APN values through carrier bundles or configuration profiles, which tends to be more consistent than how Android handles it, since Android has no single enforced profile format and some providers leave APN entry up to you, according to this Android APN setup guide.
When the APN is wrong or missing, you’ll usually notice one of these:
- Signal and Wi-Fi calling work, but mobile data won’t load pages or apps.
- Text messages send fine, but picture or video messages (MMS) fail.
- A personal hotspot won’t share data even though the phone itself has a connection.
- Data works at home but stops the moment you cross a border.
Any of these point to the same first move: open your cellular settings and look at the APN before trying anything else.
iPhone: how to view, install, or enter APN settings
On most iPhones, your carrier’s APN loads automatically when you activate an eSIM. To check it yourself:
- Open Settings and tap Cellular (or Mobile Data).
- Select the eSIM line you want to check, then tap Cellular Data Network.
- Review the APN, Username, and Password fields against what your provider lists.
If your provider sends a configuration profile instead, you install it by opening the file (usually a .mobileconfig link or attachment) and following the prompt, then confirming under Settings → General → VPN & Device Management. Only install a profile from a source you trust, since a profile can also change other network behavior on your phone.
Some iPhones won’t show a Cellular Data Network menu at all. According to Apple’s support documentation, this means the carrier has locked APN editing, and the fix is to request an official configuration profile from your provider or contact their support team directly rather than trying to force a manual entry.
Pro Tip: After changing any APN field, toggle Airplane Mode on and off, or restart your phone, and make sure Data Roaming is switched on if you’re using the eSIM abroad.
Android: where to find and edit APN on Pixel and Samsung
Android handles APN differently depending on the manufacturer, and there’s no single screen that works the same way across every brand. A practical APN guide for Android devices notes that some eSIM providers embed APN data in the profile while others expect you to enter it yourself, which is one reason manual setup shows up more often on Android than on iPhone.
- On Pixel phones: go to Settings → Network & Internet → SIMs, tap your eSIM line, then select Access Point Names.
- On Samsung phones: go to Settings → Connections → Mobile Networks → Access Point Names (the exact wording can shift slightly between One UI versions).
- Universal shortcut: type “APN” into the Settings search bar on almost any Android phone to jump straight to the Access Point Names screen, skipping the menu hunt entirely.
- Once you’re on the APN screen, tap the + icon to add a new entry, or tap an existing one to edit it.
- After entering or confirming the values, select that APN as active. Android marks the active entry with a filled circle next to its name, and it has to be selected for that APN to actually route your data.
Two settings matter just as much as the APN itself. First, confirm the correct eSIM line is chosen for mobile data if your phone is running two profiles at once. Second, turn on Data Roaming for any travel eSIM, since Android generally treats a destination network as roaming even when the plan was built for that exact country.
Pro Tip: If you’re juggling a home SIM and a travel eSIM, label the APN entries by carrier name so you don’t accidentally edit the wrong one before a trip.
When you’ll actually need to enter an APN manually
Automatic provisioning covers most situations, but a few scenarios call for manual entry:
- You’re using an MVNO or a smaller eSIM provider that doesn’t embed APN data in its profile.
- Your Android device’s built-in carrier database doesn’t recognize that MVNO, which is more common with lesser-known operators.
- You reset network settings or reinstalled a profile, which wipes saved APN customizations even though it typically leaves the eSIM profile itself intact.
- Your device is carrier-locked and the active carrier profile is blocking APN edits entirely.
- You need hotspot or MMS to work and the default APN on your line doesn’t support it, requiring a second, separate entry.
If none of these apply and data still isn’t working, the problem is more likely a line selection or roaming toggle than the APN itself.
Quick troubleshooting checklist for signal with no data
Work through these in order before assuming the APN is broken:
- Open your cellular settings and confirm the eSIM line is selected and set as the preferred line for Mobile Data.
- Turn on Data Roaming if you’re using the eSIM outside your home country, then toggle Mobile Data or Airplane Mode off and on.
- Compare the APN string character by character against your provider’s documentation. A stray space or wrong capitalization is a common, invisible culprit.
- If data still won’t connect, switch APN Protocol from IPv4/IPv6 to IPv4 only, since some networks don’t fully support the dual setting.
- Reset network settings as a last resort, then reinstall the eSIM profile or configuration profile from your provider.
- For hotspot failures specifically, check whether APN Type needs “dun” added, or whether your provider requires a separate tethering APN. Our hotspot setup guide for eSIM travelers walks through this in more detail.
Pro Tip: Screenshot your working APN settings before a network reset so you can re-enter them in seconds if the reset clears them.
APN field reference and example values you can copy
Here’s what each field controls when you’re entering an APN manually:
- Name: a label you choose; it doesn’t affect the connection.
- APN: the exact access point string your provider gives you, case-sensitive on some devices.
- Proxy, Port, Server: usually left blank unless your provider specifies otherwise.
- Username, Password: required by some carriers, often left blank for others.
- MMSC, MMS Proxy, MMS Port: needed only for picture and video messaging.
- MCC, MNC: numeric codes identifying the country and carrier network.
- Authentication Type: typically “PAP” or “CHAP,” or “Not set” if unspecified.
- APN Type: use
default,supl,mms,dunfor full functionality, or justdefaultfor data-only access, per this iPhone APN configuration guide. - APN Protocol: set to
IPv4/IPv6, falling back toIPv4if the connection is unstable.
A generic data-only entry might just list the APN string with APN Type set to default. A full-service entry adds supl for location services and mms for messaging. A tethering-specific entry adds dun so your hotspot can share the connection separately from your phone’s own browsing.
How to verify APN settings on a Lumo eSIM plan
When you activate an eSIM, the APN is often included in the profile for networks, so in many cases you install the QR code and get online without opening a single settings menu. It’s still worth a quick check after activation, especially if you’re switching between regional plans on the same device.
Open your cellular settings and find the eSIM line (iPhone: Settings → Cellular → [eSIM line] → Cellular Data Network; Android: Settings → Network & Internet → SIMs → [eSIM line] → Access Point Names). Confirm an APN entry is present and marked active. If the field is empty or data isn’t working despite good signal, the most common cause is the data roaming toggle rather than a missing APN, since some destination networks require it switched on even for a plan built for that exact country.
If you bought a Global eSIM plan or a regional plan like Europe or Asia, the underlying network can differ by country, so it’s worth checking our coverage page to confirm which carrier your device connected to. If anything looks off, our support team can confirm the exact APN string for your line rather than guessing at values.
Switching APN settings between regional Lumo eSIM profiles
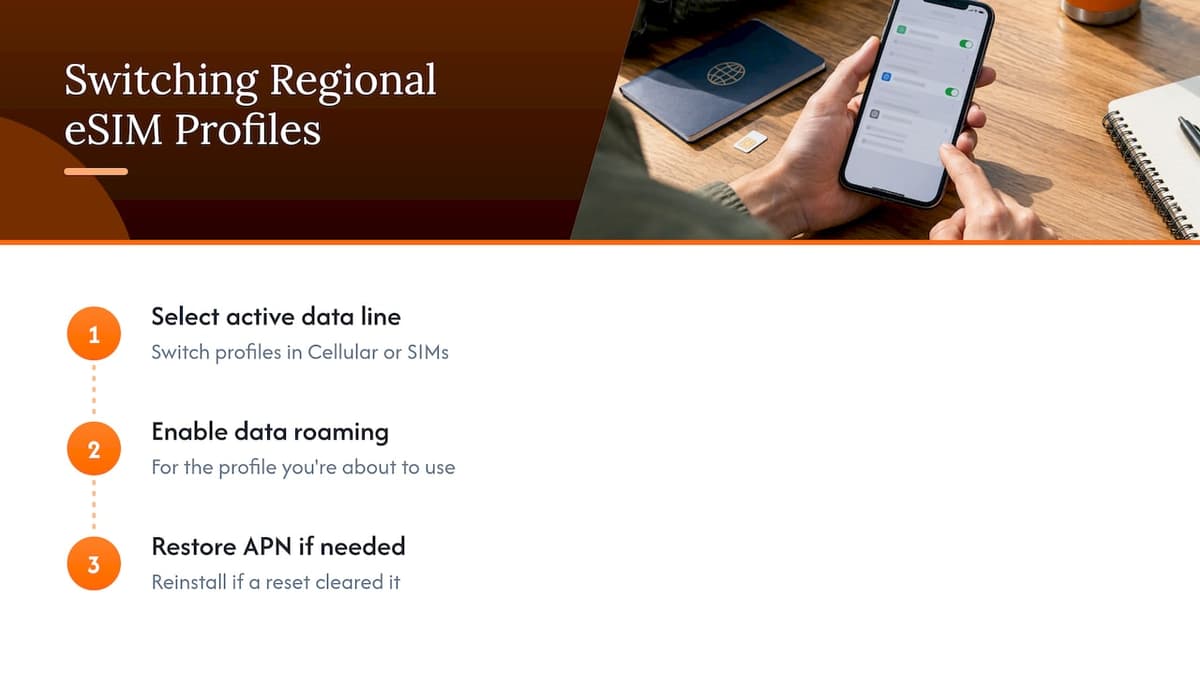
If you carry more than one Lumo eSIM profile, say one for Europe and another for a different region, each profile typically installs its own APN automatically, so switching between them is usually just a matter of selecting the right line under your cellular settings, not re-entering network values by hand.
Before a trip, open your device’s eSIM list and confirm which profile is set as the active data line. On iPhone, this lives under Settings → Cellular; on Android, under Settings → Network & Internet → SIMs. Make sure data roaming is on for the profile you’re about to use, since a profile built for one region can still register as roaming depending on the local network it connects to on arrival.
If you notice one profile isn’t picking up data after you land, check that its APN field didn’t get cleared by a recent network reset, which is one of the few situations where you’d need to reinstall the profile or re-enter the APN manually. Our guide on managing multiple eSIM profiles covers how to keep several regional plans organized on one device without mixing up which line is active. For most travelers moving between a couple of North America and United Kingdom plans, the switch is as simple as toggling which line handles mobile data.
Backing up and restoring APN settings across devices
eSIM profiles generally don’t transfer the way physical SIM cards do, so moving to a new phone usually means reinstalling the profile rather than restoring a backup file. Before you switch devices, write down or screenshot your current APN fields (Name, APN, APN Type, APN Protocol) in case your new device doesn’t pick them up automatically.
On iPhone, if your plan came with a configuration profile, keep the original installation link or QR code so you can reinstall it rather than re-entering each field by hand. On Android, the same logic applies: if the carrier database already recognizes your provider, the APN often reappears on its own, but it’s still worth comparing it against your saved screenshot.
A network settings reset behaves the same way: it clears saved customizations but usually leaves the eSIM profile itself installed, so reinstalling or re-syncing the profile from your provider typically restores the correct APN without starting from scratch. If you’re moving a Lumo eSIM to a new device, reactivating from your original QR code or account confirmation is the most reliable path, since it reloads the full profile including APN rather than relying on a partial manual re-entry.
What frequent travelers get wrong about APN settings
Most data problems people blame on “bad APN settings” are actually a line selection or a roaming toggle left off. Checking those two things first saves far more time than hunting for the perfect APN string.
The habit worth building is keeping one profile you’ve already tested and trust, rather than switching providers every trip and relearning a new setup each time. Organize your profiles clearly, confirm hotspot support before you leave, and keep your provider’s support contact saved somewhere you can reach it without data, since that’s exactly when you’ll need it most.
— Theo Wheeler
Simplify your setup with Lumo eSIM plans
This guide aims to help make eSIM activation simple: often, activation happens through a QR code, the APN loads with the profile, and there is no account registration standing between you and a working connection.
If you want a plan ready before your next trip, check our Global eSIM Plans, United States eSIM Plans, or North America eSIM Plans for regional coverage. For step-by-step activation help, our eSIM setup guide for travelers walks through installation from start to finish, and our support team is available around the clock if anything needs a second look.
FAQ
How do I go to eSIM settings on my phone?
On iPhone, go to Settings → Cellular, then tap Add eSIM or select an existing eSIM line to view its details. On Android, go to Settings → Network & Internet → SIMs, where you can add, remove, or manage eSIM profiles depending on your device.
What is an APN on a SIM card?
An APN, or Access Point Name, is the setting that tells your phone how to connect to your carrier’s data network and reach the internet. It’s the same concept whether you’re using a physical SIM or an eSIM.
What is a disadvantage of using an eSIM?
An eSIM can’t be physically swapped between phones the way a SIM card can, so switching devices usually means reinstalling the profile from your provider rather than moving a card. Some older or budget devices also don’t support eSIM at all, which limits which phones can use it.
How do I change APN settings on an Android phone?
Go to Settings, search for “APN,” and select Access Point Names from the results, which works across most brands including Pixel and Samsung. Tap the + icon to add a new entry or select an existing one to edit the APN, MMSC, and APN Type fields, then set it as the active APN.
Sources
- View and edit your APN on your iPhone and iPad - Apple Support
- APN setup guide for Android — Pixel and Samsung step by step | SimFinder
Recommended
Related Topics
Stay Connected Anywhere
Prepaid eSIM data plans for 180+ countries and territories. No physical SIM required.