How to Connect Devices Internationally: eSIM Workflow Guide

TL;DR:
- Purchasing a prepaid eSIM, pre-installing it at home, and activating on arrival streamline international device connectivity. Most flagship phones support eSIM, but compatibility depends on unlocking status and regional variants; proper planning and labeling ensure smooth setup. Switching from carrier roaming to prepaid eSIM plans can save frequent travelers hundreds annually, especially with providers like Lumo offering broad coverage and support.
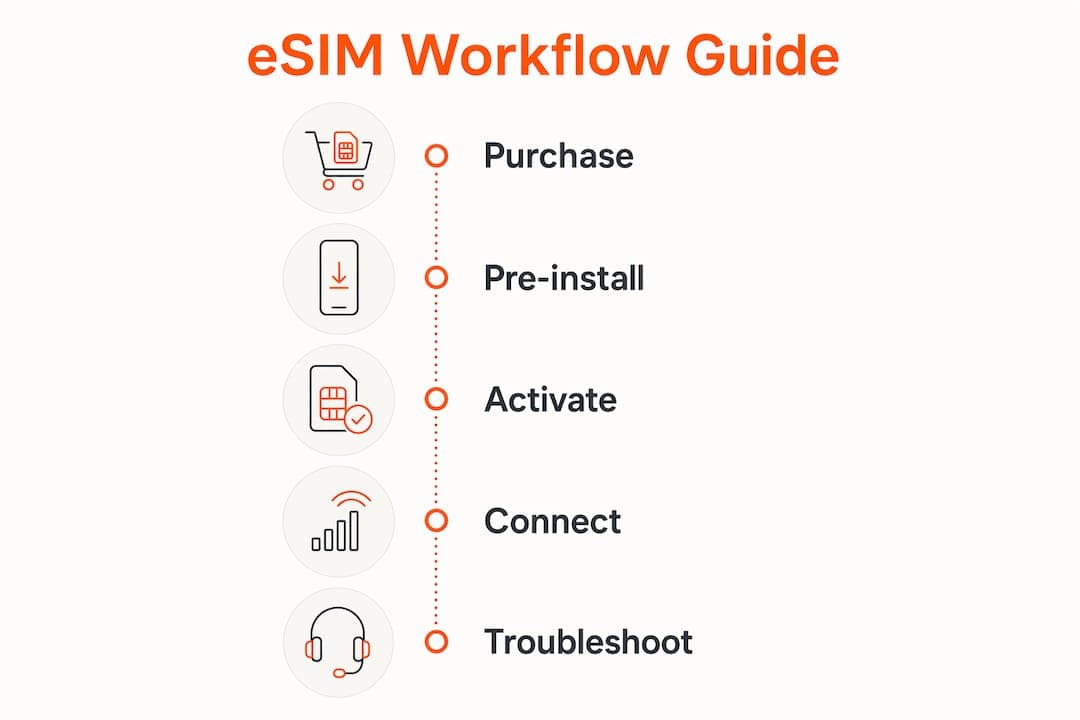
Buy a prepaid eSIM plan, pre-install the profile on home Wi-Fi, set it to activate on arrival, then designate it as your default data line and hotspot source for your tablet and laptop. That’s the whole connect devices internationally workflow in one sentence.
Before you leave, run through this checklist:
- Device unlock and eSIM support. Confirm your phone is carrier-unlocked and supports Apple eSIM (iPhone XS or later) or Android eSIM (Pixel 3+, Samsung Galaxy S20+, and most 2022+ flagships). Check IMEI unlock status in Settings or via your carrier.
- Buy the right plan and pre-install. Purchase a prepaid local, regional, or global plan, then install the profile over home Wi-Fi. Set activation to start on arrival, not on install.
- Set defaults and test on landing. Switch your cellular data default to the travel eSIM, enable hotspot/tethering for your tablet and laptop, and run a quick speed test before leaving the airport.
For North America travelers, Lumo eSIM covers 160+ countries with instant QR activation, multi-profile support, and 24/7 help — the cleanest end-to-end option for this workflow.
Pro Tip: Set up your authenticator app before you fly. SMS-based two-factor authentication can fail when your home SIM is on a foreign network, and airport Wi-Fi is not the place to troubleshoot account lockouts.
Table of Contents
- What’s the step-by-step workflow for connecting all your devices internationally?
- Which devices actually support eSIM, and what should you check?
- How do you choose the right prepaid eSIM plan?
- How do you manage multiple devices on one eSIM plan?
- What should you do when activation or network connection fails?
- Privacy, security, and North America operational notes
- What do the numbers say about eSIM savings?
- Key Takeaways
- The workflow most travelers get wrong
- Lumo makes this workflow repeatable for every trip
- Useful sources
- FAQ
What’s the step-by-step workflow for connecting all your devices internationally?
Pre-trip (48 hours before departure)
- Check carrier unlock status. Call your carrier or dial *#06# to get your IMEI, then verify unlock eligibility. A locked device will reject third-party eSIM profiles entirely.
- Confirm eSIM support. On iPhone: Settings > Cellular > Add eSIM. On Android: Settings > Connections > SIM Manager. If neither path exists, your device or carrier variant may not support eSIM.
- Back up QR codes and credentials. Screenshot the QR code and save your provider login to a password manager. Airport Wi-Fi is unreliable for re-downloading activation emails.
- Buy the plan. Choose local, regional, or global based on your route (more on that below). Purchase over home Wi-Fi and install the profile immediately, but set the activation start to your arrival date.
- Label the profile. Name it something like “Japan-Data-June” so you never accidentally route calls through the wrong line.
At the gate
- Turn off automatic network selection. This prevents your phone from latching onto a satellite or paid maritime network mid-flight.
- Confirm the profile is installed but not yet consuming plan days. Most prepaid eSIMs let you set a start date; verify this in your provider’s app.
On landing
- Enable Data Roaming for the travel eSIM line only. Keep your home SIM set to “No Data.”
- Set Cellular Data default to the travel eSIM in Settings.
- Run a speed test. A quick ping confirms the network attached correctly before you rely on it for navigation.
- Enable hotspot/tethering on your phone and connect your tablet and laptop. Check your plan’s tethering policy first — some plans cap or block hotspot use.
The full timeline from purchase to multi-device connectivity is typically under five minutes when you pre-install at home. Activation itself is instant to a few minutes once you land.
Pro Tip: Keep your physical SIM in the device as a backup. If your screen cracks or an eSIM transfer gets blocked, that physical card is your lifeline.
Which devices actually support eSIM, and what should you check?
Most flagship phones released after 2020 support eSIM, but the details matter. Devices typically store 10–20 profiles but can only run one or two active lines simultaneously. That limit shapes your entire multi-device strategy.
| Device category | eSIM support | Active profile limit | Notes |
|---|---|---|---|
| iPhone XS and later | Yes (Apple eSIM) | 2 active (dual eSIM) | iOS steps documented by Apple; requires unlocked device |
| iPad (cellular, 2020+) | Yes | 1 active | Useful as a standalone data device |
| Android flagships (Pixel 3+, Samsung S20+) | Yes | 1–2 active | Manufacturer and region variants differ |
| Windows laptops (Surface Pro 9+, select ThinkPads) | Yes | 1 active | Less common; check OEM specs |
| China-market device variants | Often no | N/A | eSIM hardware frequently absent in CN SKUs |
To confirm eSIM support on iOS: Settings > Cellular > Add eSIM. On Android: Settings > Connections > SIM Manager. If the path doesn’t exist, you’re likely on a carrier-locked or region-restricted variant.
- Carrier-locked phones block third-party eSIM profiles until the lock is cleared — even if the hardware supports eSIM.
- Some carriers require you to complete a loan or installment plan before unlocking.
- China-market variants of otherwise eSIM-capable phones (certain Pixel and Samsung models) ship without the eSIM chip.
Pro Tip: If you manage a remote device workflow across a team, audit every device’s unlock and eSIM status before the trip, not at the gate.
How do you choose the right prepaid eSIM plan?
The decision comes down to four variables: trip length, number of countries, whether you need tethering, and daily data volume.
- Local plans offer the lowest per-GB cost but cover only one country. Best for single-destination trips of a week or more.
- Regional plans cover a defined area (Europe, Southeast Asia, North America) under one profile. Convenient for border-hopping; per-GB cost sits between local and global.
- Global plans work in dozens of countries with no profile swaps. Highest convenience, highest per-GB cost, and sometimes stricter throttle thresholds.
| Plan type | Best for | Tethering | 5G availability |
|---|---|---|---|
| Local | Single-country, 5+ days | Usually allowed | Common on flagship networks |
| Regional | 2–5 countries, 1–3 weeks | Plan-dependent | Varies by partner network |
| Global | 6+ countries or unpredictable routes | Often limited | Less consistent |
A practical data estimate for a 10-day trip: light use (maps, email, messaging) runs roughly 1–2 GB; adding video calls and occasional streaming pushes that to 5–10 GB. A 10 GB regional plan for a 10-day Europe trip is a reasonable baseline.
One North America-specific note: some carrier-branded passes require purchase or activation inside the U.S. to enable cross-border roaming to Canada and Mexico. Buy before you leave home.
Pro Tip: If you need to tether a laptop, explicitly confirm the plan allows hotspot. “Unlimited data” does not automatically mean unlimited tethering — many plans throttle or block it after a set threshold.
How do you manage multiple devices on one eSIM plan?
Two strategies cover most travelers: one travel eSIM on your phone with hotspot for everything else, or separate eSIM profiles per device.

| Strategy | Pros | Cons |
|---|---|---|
| Single eSIM + hotspot | One plan, one bill, simple setup | Phone battery drains faster; tethering may be capped or blocked |
| Separate eSIM per device | Independent connectivity; no battery dependency | Higher cost; KYC requirements on some local plans |
For most digital nomads, the single-eSIM-plus-hotspot approach works well. Here’s how to set it up:
- Install the travel eSIM on your primary phone and confirm it’s active.
- Enable hotspot in Settings and connect your tablet and laptop via Wi-Fi.
- Test the tethered connection with a speed test on each device before you need it for work.
- If your plan blocks tethering, install a secondary data-only eSIM on your tablet as a fallback.
Profile hygiene matters more than most travelers expect. Pre-installation and clear labeling are the difference between a smooth arrival and a 20-minute airport troubleshooting session. Name profiles with country and purchase date, store QR backups in an encrypted note, and delete expired profiles to keep your SIM manager readable.
Pro Tip: For work-critical trips, carry two data sources: one eSIM plus a local physical SIM, or two eSIMs from different providers. Single-source redundancy is the one thing most nomads skip until it fails them.
What should you do when activation or network connection fails?
Most failures fall into three categories: profile didn’t download, data won’t connect after installation, or the device shows signal but no internet.
- Profile download failed: Re-scan the QR code on a stable Wi-Fi connection. If the QR has expired, contact your provider for a reissue.
- Data won’t connect: Confirm Data Roaming is ON for the travel eSIM line. Check that Cellular Data is set to the travel eSIM, not your home SIM.
- Signal but no internet: The APN may be wrong. Re-enter it from your provider’s help page, or reset network settings and re-enter manually.
Quick fixes in order:
- Reboot the device. A restart forces a fresh network attach and resolves most post-installation issues.
- Manually select a carrier partner network (Settings > Cellular > Network Selection > Manual).
- Check APN settings and re-enter if needed.
- Toggle VoLTE/Wi-Fi Calling if voice is included in your plan.
When to contact support: if activation fails after two attempts, the QR can’t be reissued, or the device is blocking the profile due to a carrier lock. When you reach out, include your IMEI, device model, OS version, proof of purchase, and screenshots of the activation error. That package cuts resolution time significantly.
Pro Tip: Use your provider’s in-app chat first. It’s faster than email and lets you share screenshots directly, which speeds diagnosis.
Privacy, security, and North America operational notes
A few security habits protect your data and your accounts on the road.
- Enable a SIM PIN on both your home and travel eSIM lines (Settings > Cellular > SIM PIN).
- Store QR backup codes in an encrypted notes app, not a screenshot folder.
- Use an authenticator app (Google Authenticator, Authy) instead of SMS for 2FA wherever possible. Some North America carriers charge for incoming SMS abroad — confirm your home carrier’s policy before you leave.
- Verify device unlock status before purchasing any eSIM plan. A locked device wastes the purchase.
- For local eSIM purchases in certain countries, KYC (identity verification) is required by local regulation. Global plans typically avoid this by using roaming partners.
Pro Tip: Turn on iMessage and FaceTime for your home number before you fly. Once abroad, reactivating them requires SMS verification — which may fail if your home SIM has no signal.
This article covers practical operational steps, not legal advice. For regulatory or tax questions specific to your situation, consult a qualified advisor in your jurisdiction.
What do the numbers say about eSIM savings?
51% of new eSIM users discovered the technology through travel, and global eSIM connections are projected to reach 4.9 billion by 2030.
The financial case is straightforward. Frequent travelers who switch from carrier roaming add-ons to prepaid eSIM plans typically save $500–$1,000 annually, depending on trip frequency and destination mix.
A worked example: a traveler taking six international trips per year, each 10 days, spending roughly $15/day on a carrier roaming pass, spends $900 annually. A comparable prepaid eSIM plan for the same trips often runs $30–$60 per trip, totaling $180–$360. The gap is real and compounds quickly for anyone traveling more than four times a year.
For a personalized estimate, Lumo’s cost savings breakdown lets you model your own trip frequency and data needs against prepaid plan pricing.
| Scenario | Roaming cost (est.) | Prepaid eSIM cost (est.) | Annual savings (est.) |
|---|---|---|---|
| 6 trips × 10 days @ $15/day | $900 | $180–$360 | $500–$1,000 |
Pro Tip: Check Lumo’s eSIM benefits page for current per-region pricing to plug into your own calculation before you buy.
Key Takeaways
The fastest way to connect multiple devices internationally is to pre-install a prepaid eSIM at home, set it to activate on arrival, and hotspot your tablet and laptop from your phone.
| Point | Details |
|---|---|
| Pre-install, don’t activate early | Install the eSIM profile on home Wi-Fi and set the start date to arrival to avoid wasting plan days. |
| Check unlock and eSIM support first | A carrier-locked device or China-market variant will block third-party eSIM profiles regardless of hardware. |
| Hotspot covers most multi-device needs | One travel eSIM on your phone plus hotspot handles tablet and laptop — confirm the plan explicitly allows tethering. |
| Savings are significant | Frequent travelers typically save a substantial amount per year switching from roaming passes to prepaid eSIM plans. |
| Lumo for North America travelers | Lumo offers instant QR activation, 160+ country coverage, and 24/7 support — purpose-built for this workflow. |
The workflow most travelers get wrong
Most connectivity guides focus on which plan to buy. The part that actually breaks trips is timing and hygiene: installing too late, skipping profile labels, and forgetting that “unlimited data” and “unlimited hotspot” are not the same thing.
The travelers who land and have data in 60 seconds are the ones who treated the pre-trip checklist as seriously as packing. They installed the eSIM at home, labeled it clearly, confirmed tethering was allowed, and set up their authenticator app before the gate closed. None of that is technically hard. It just requires doing it before you’re standing in a foreign airport with dead Wi-Fi and a boarding pass that needs scanning.
Lumo’s QR activation and multi-profile support make the technical side as frictionless as it can be. The rest is discipline — and now you have the checklist.
Lumo makes this workflow repeatable for every trip
Roaming charges from your home carrier can cost $10–$15 per day, and that bill arrives after the trip. Lumo flips the model: you pay a fixed prepaid amount before you leave, install in minutes via QR code, and land with data already waiting.
Lumo covers 160+ countries, supports multiple eSIM profiles across smartphones, tablets, and laptops, and includes hotspot-friendly plans so your whole device setup runs off one purchase. If activation fails for any reason, 24/7 support is available to reissue your profile or troubleshoot in real time. No contracts, no registration, no roaming surprises.
Browse Lumo’s prepaid eSIM plans and pick your region before your next trip. Purchase, install at home, activate on arrival.
Useful sources
- Curious Magazine: Travel eSIMs That Just Work — activation methods, plan types, profile hygiene, and troubleshooting.
- Digital Nomads Magazine: eSIM Cards for Travel 2026 — device compatibility, profile storage limits, and activation timing.
- Apple Support: Use eSIM while traveling internationally — iOS-specific steps for adding and managing travel eSIM profiles.
- Truescho: eSIM vs Physical SIM 2026 — adoption statistics, cost-savings estimates, and carrier-lock caveats.
- T-Mobile Prepaid eSIM USA Travel Plans — North America activation restrictions and regional pass details.
- Lumo eSIM Blog — travel connectivity guides, device setup tips, and nomad-focused eSIM advice.
FAQ
What devices support eSIM for international travel?
Most flagship smartphones released after 2020 support eSIM, including iPhone XS and later, Google Pixel 3+, and Samsung Galaxy S20+. Carrier-locked devices and China-market variants often do not, so check your unlock status before purchasing a plan.
How long does eSIM activation take?
Activation is typically instant to a few minutes when installed over a reliable Wi-Fi connection. Pre-installing at home and setting the start date to arrival avoids wasting plan days and eliminates airport activation stress.
Can I use one eSIM plan for my phone, tablet, and laptop?
Yes. Install the travel eSIM on your phone, enable hotspot, and connect your tablet and laptop via Wi-Fi tethering. Confirm your plan explicitly allows hotspot use, as some prepaid plans cap or block tethering.
How much can I save by switching to prepaid eSIM plans?
Frequent travelers typically save $500–$1,000 per year compared with daily carrier roaming passes, depending on trip frequency and destination. The savings grow quickly for anyone traveling more than four times annually.
Does Lumo work for North America travelers going abroad?
Lumo covers 160+ countries with instant QR activation and 24/7 support, making it a practical choice for North America travelers heading to Europe, Asia, Latin America, and beyond. Plans are prepaid with no contracts or registration required.
Recommended
Related Topics
Stay Connected Anywhere
Prepaid eSIM data plans for 180+ countries and territories. No physical SIM required.