iPad eSIM Setup: A Step-by-Step Activation Guide
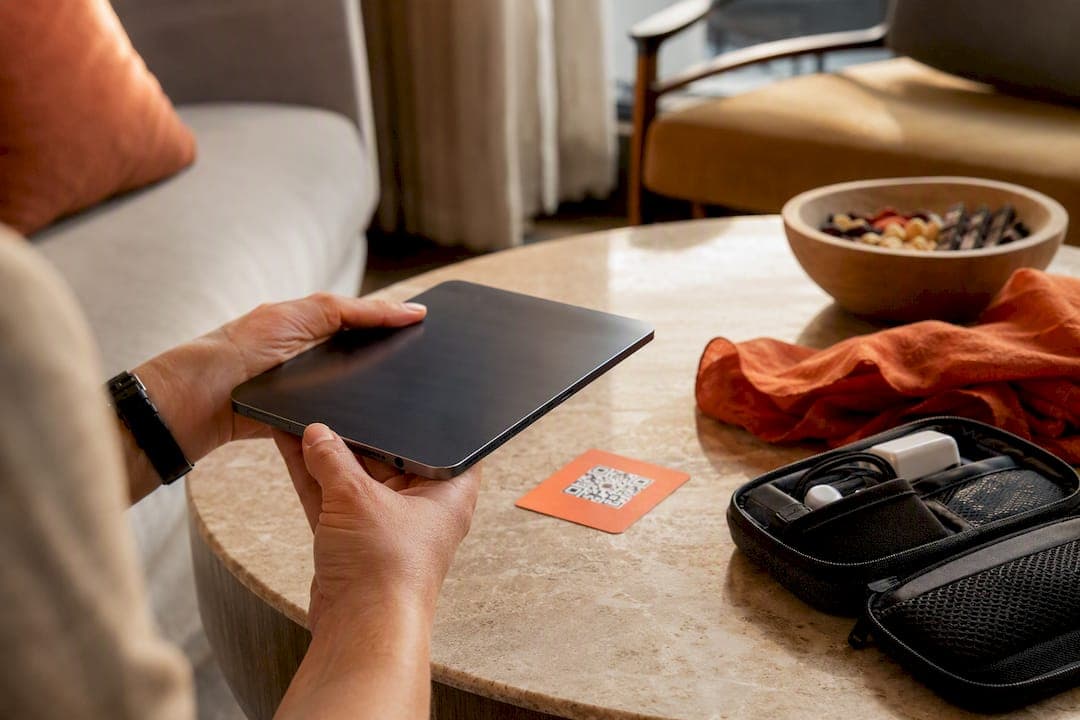
If your iPad is a Wi‑Fi + Cellular model, you can activate an eSIM directly on the device, and the fastest route is usually Settings → Cellular Data (or Mobile Data) → Find a New Plan, or scanning a carrier’s QR code. Wi‑Fi-only iPads cannot use eSIM at all because they lack the cellular modem the profile needs.
Before you touch a setting, run two quick checks:
- Confirm your iPad is a Wi‑Fi + Cellular model, not Wi‑Fi-only.
- Confirm iPadOS is updated and you’re connected to Wi‑Fi for the initial download.
If both check out, activation usually takes under five minutes — and if you’re managing travel finances alongside your prepaid eSIM plans, it can help to compare money transfer rates to find cheapest apps and promo codes.
Key Takeaways
Getting an iPad eSIM working comes down to confirming your model has cellular hardware, then matching the activation method (carrier plan, QR code, or transfer) to your actual situation.
| Point | Details |
|---|---|
| Confirm hardware first | Check Settings → General → About; Wi‑Fi-only iPads cannot run an eSIM under any method. |
| Use the right activation path | Choose Find a New Plan for new carrier plans, QR codes for prepaid travel plans. |
| Fix location settings before panicking | An empty carrier list in Find a New Plan is usually a Location Services issue, not a broken iPad. |
| Only one eSIM is active at a time | You can store several profiles but must switch manually in Settings → Cellular Data. |
| Consider a QR-first plan for travel | Lumo’s prepaid eSIM plans bypass limited carrier menus with a single QR scan across 160+ countries. |
Table of Contents
- How Do I Know If My iPad Supports eSIM Setup?
- What Are the Main Ways to Activate an iPad eSIM?
- How Do I Set Up eSIM Using Find a New Plan?
- How Do I Add an eSIM With a QR Code or Link?
- Can I Transfer or Share an eSIM Plan From My iPhone?
- Why Won’t My iPad Let Me Add an eSIM?
- How Do I Manage Multiple eSIM Plans on iPad?
- Who Wrote This Guide and Why It Matters
- What Actually Trips People Up During iPad eSIM Setup
- Get an eSIM Plan That Skips the Carrier Menu Entirely
- Sources
- FAQ
How Do I Know If My iPad Supports eSIM Setup?
Not every iPad can run an eSIM, and a growing number of newer models can only run an eSIM. Here’s how to tell where yours falls.
- Check the model. Go to Settings → General → About and look at the model name and year. If it says “Wi‑Fi + Cellular,” you have the cellular radio needed for eSIM.
- Know the eSIM-only lineup. The M4 iPad Pro, M2 iPad Air, and A17 Pro iPad mini ship without a physical SIM tray at all. Any Wi‑Fi + Cellular iPad from 2018 forward generally supports eSIM in some form.
- Look for the Cellular menu. Open Settings. If you see “Cellular Data” or “Mobile Data” listed, your hardware supports it. If that menu is missing entirely, your iPad doesn’t have cellular hardware, and no software trick will add it.
What Are the Main Ways to Activate an iPad eSIM?
Apple lists five primary activation paths for iPad, and picking the right one saves you a round of frustration.
- Carrier activation: your provider assigns and provisions the eSIM remotely, often after you buy a plan online or in-store.
- Find a New Plan: you buy a fresh data plan straight from Settings without contacting anyone.
- QR code or activation link: you scan or tap an image your carrier or eSIM provider gives you.
- Quick Transfer: you move an existing plan from one iPad to another.
- Join an existing iPhone plan: you extend a plan you already pay for onto a second device.
New plan purchases and traveler pre-purchases both favor Find a New Plan or a QR code, since neither requires a second device. Quick Transfer only matters when you’re upgrading iPads, and joining an iPhone plan only works if your carrier explicitly supports multi-device sharing. On a stable Wi‑Fi connection, most of these finish in well under five minutes.
How Do I Set Up eSIM Using Find a New Plan?
This is the most common path for anyone buying a fresh plan directly through Apple’s built-in flow, and it’s documented in Apple’s cellular setup guide.
- Open Settings and tap Cellular Data (labeled “Mobile Data” in some regions).
- Tap Find a New Plan or Add a New Plan.
- Select a carrier from the list that appears.
- Follow the on-screen prompts to enter payment and account details.
- Wait for the plan to download and activate, which usually takes one to two minutes.
If that carrier list shows up empty, your iPad’s location services may be disabled, which prevents it from matching you to local providers.
Pro Tip: Turn on Location Services under Settings → Privacy & Security before opening Find a New Plan. An empty carrier list is almost always a location permissions issue, not a network problem.

Once activation finishes, you’ll see the plan name, signal bars, and data allowance under Cellular Data in Settings, confirming it’s live.
How Do I Add an eSIM With a QR Code or Link?
Scanning a QR code is the standard method for prepaid travel plans and many carrier-issued eSIMs, and it’s built into iPadOS in a couple of different ways.
- Open the Camera app and point it at the QR code, or go to Settings → Cellular Data → Add Cellular Plan and scan from there.
- On iPadOS 17.4 or later, you can also touch-and-hold a QR image directly in an email or web page and select Add eSIM.
- Tap Allow, then Continue, then Add Mobile Plan. Enter any confirmation code the provider gave you if prompted.
- Wait for the “eSIM Installed” confirmation before closing Settings.
If the scan fails repeatedly, don’t keep retrying the same code. Switch to the carrier’s app, if one exists, or ask for manual entry details, which usually consist of an SM-DP+ address and an activation code you type in by hand. Lumo’s QR code activation guide walks through this exact flow in more visual detail if you want a side-by-side reference.
Can I Transfer or Share an eSIM Plan From My iPhone?
Two other methods matter mainly for people juggling multiple Apple devices rather than buying a brand-new plan.
- Quick Transfer: go to Settings → Cellular Data → Transfer iPad Plan, then follow the prompts to move an active eSIM from an old iPad to a new one nearby.
- Join iPhone Plan: works only if your carrier explicitly supports adding a tablet line to an existing phone plan, and you’ll be prompted through Settings on the iPad once your iPhone is nearby.
If your carrier doesn’t support either flow, skip straight to a QR code or a direct call to support instead of troubleshooting a dead end.
Why Won’t My iPad Let Me Add an eSIM?
Most activation failures trace back to one of three causes, and Apple’s own troubleshooting notes point to the same short list.
- Wrong hardware. If Settings doesn’t show a Cellular Data menu at all, you have a Wi‑Fi-only iPad, and no eSIM will ever install.
- Carrier locks. Some carriers restrict which eSIMs will provision on a device depending on where you bought it. One Apple Discussions thread documents exactly this: an iPad Air that flat-out refused to activate an eSIM until the user contacted the carrier directly to release the restriction.
- Wrong plan type. A phone-only eSIM plan often won’t provision on tablet hardware, even if the code scans successfully.
Start with the basics: confirm your model supports cellular, make sure iPadOS is current, and restart the device. If the QR code or link keeps failing, double-check the plan was actually issued for “iPad” or “tablet” use, not phone-only, and try the process again on Wi‑Fi rather than cellular data. Lumo’s guide to fixing eSIM activation problems covers these same failure points with more platform-specific detail.
Pro Tip: If the carrier app and Settings both fail, check your purchase history. A carrier-locked device (even one bought outright) can silently block third-party eSIM provisioning until the carrier removes the restriction on their end.
How Do I Manage Multiple eSIM Plans on iPad?
You can store several eSIM profiles on one iPad, but only one can be active for data at any given moment.
- Go to Settings → Cellular Data and look under Cellular Plans (sometimes labeled SIMs) to see everything installed.
- Tap the plan you want active. Only the selected plan carries data; the others stay dormant until you switch back.
- To remove a plan permanently, tap it, then choose Remove Cellular Plan. This is different from just switching away from it, and it can’t be undone without reinstalling the eSIM from scratch.
This setup works well for travelers who keep a home plan and a destination plan side by side, switching between them instead of juggling physical SIM cards.
Who Wrote This Guide and Why It Matters
Theo Wheeler covers device connectivity and mobile plans for readers who want the shortest path from “new iPad” to “working data connection,” without wading through forum threads. Lumo built its own eSIM plans around the same QR-first workflow this guide describes, with coverage across 160+ countries designed for exactly the carrier-menu gaps travelers run into.
The gap between Apple’s own instructions and what actually trips people up isn’t the steps. It’s picking the right activation method before you start, and knowing which failure is a hardware limit versus a carrier restriction you can actually fix.
What Actually Trips People Up During iPad eSIM Setup
Most guides treat every activation method as roughly interchangeable. They’re not. Find a New Plan works fine if you’re buying from a carrier your iPad already recognizes in your region, but it’s close to useless for a traveler who needs data in a country their home carrier doesn’t service well. That’s exactly where a QR-activated plan wins, and I think Apple’s own documentation slightly undersells this by listing all five methods as flat, equal options.
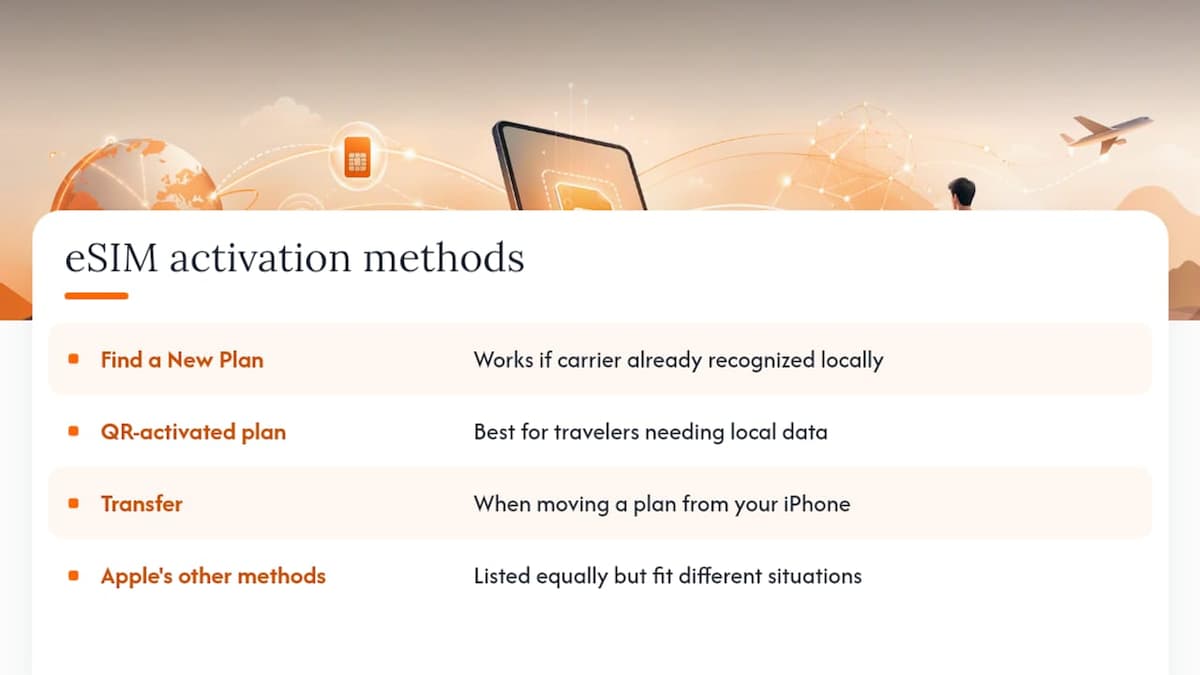
The bigger issue I see repeated across support threads is people assuming a failed activation means their iPad is broken. It almost never is. It’s a location-services toggle, a carrier lock, or a plan issued for the wrong device type. That distinction changes what you do next: restarting your iPad ten times won’t fix a carrier restriction, and calling support won’t fix a disabled Location Services setting.
If you take one thing from this guide, prioritize matching the activation method to your actual situation, new plan, transfer, or travel, before you touch a single setting. Get that right, and the rest is mechanical.
— Theo Wheeler
Get an eSIM Plan That Skips the Carrier Menu Entirely
If you’d rather not gamble on whether your carrier’s Find a New Plan list even recognizes where you’re traveling, Lumo sells prepaid eSIM plans built specifically for that gap. Instead of hunting through carrier menus that vary by region and device, you scan one QR code and you’re online, with coverage across 160+ countries and no contract or registration step standing between you and a working connection. That fits the exact workflow this guide just walked through: pick a plan, scan the code, confirm it’s active in Settings. For an iPad you’re taking abroad, or one giving you carrier grief at home, check Lumo’s current eSIM plans and get a QR code ready before your next trip.
Sources
FAQ
Can I Activate an eSIM on My iPad?
Yes, if it’s a Wi‑Fi + Cellular model. Go to Settings → Cellular Data → Find a New Plan, or scan a carrier’s QR code to get started.
Why Can’t I Add an eSIM on My iPad?
The most common causes are a Wi‑Fi-only model with no cellular hardware, a carrier-side SIM lock, or a plan issued for phones rather than tablets. Check your model first, then your carrier account.
Can You Put an eSIM on Any iPad?
No. Only Wi‑Fi + Cellular models from 2018 or later support eSIM, and newer models like the M4 iPad Pro, M2 iPad Air, and A17 Pro iPad mini are eSIM-only with no physical SIM tray at all.
Can I Get a Prepaid eSIM Plan for Travel on My iPad?
Yes. Worldwide eSIM providers like Lumo sell prepaid, QR-activated plans you can buy before a trip and install without relying on your home carrier’s local menu options.
Recommended
- eSIM Activation Issues: Quick Fixes for iPhone Users | Lumo eSIM Store
- Fix eSIM Activation Problems: Steps for iPhone & Android | Lumo eSIM Store
- Step-by-step eSIM activation guide for seamless global connectivity 2026 | Lumo eSIM Store
- Step by Step eSIM Installation for Seamless Connectivity | Lumo eSIM Store
Related Topics
Stay Connected Anywhere
Prepaid eSIM data plans for 180+ countries and territories. No physical SIM required.