eSIM Activation Issues: Quick Fixes for iPhone Users

TL;DR:
- Most eSIM activation issues are caused by a carrier lock, outdated software, or lack of a stable Wi-Fi connection. Fixing these problems with quick checks usually resolves most cases within minutes. If issues persist, steps like updating iOS, removing old profiles, or contacting support are necessary.
Most eSIM activation issues come down to three things: the phone is carrier-locked, iOS or carrier settings are out of date, or there was no stable Wi-Fi when the profile tried to download. Fix those three first, and most problems resolve in under ten minutes.
The fastest path to working service:
- Check Settings > General > About > Carrier Lock — it must read “No SIM restrictions” before anything else will work
- Connect to strong Wi-Fi, then go to Settings > General > Software Update and install any pending iOS update, then Settings > General > About to trigger any carrier settings update
- Toggle Airplane Mode on for 30 seconds, then off; restart the device; toggle the eSIM line off and back on under Settings > Cellular
Apple Support and Lumo both recommend running these three checks before any deeper troubleshooting. They resolve the majority of cases.
Table of Contents
- Why does eSIM activation fail so often?
- Quick checks you can run right now
- Step-by-step troubleshooting when quick fixes don’t work
- What to do when you’re stuck in an “Activating…” loop
- Why does your eSIM show active but have no service?
- Carrier-side problems that look like device faults
- Activation problems that happen while traveling
- When factory reset is the right call
- What to look for when buying a prepaid eSIM
- Key Takeaways
- The part most troubleshooting guides skip
- Official resources and troubleshooting pages
- Lumo gets you connected without the carrier runaround
- FAQ
Why does eSIM activation fail so often?
Carrier-locked phones are the single most common cause of immediate activation failure. A locked device will reject any eSIM from a different operator, full stop. Beyond that, the causes split into two buckets: things you can fix in minutes, and things that require waiting on the carrier.
Instant-fixable causes:
- Carrier lock — Settings > General > About > Carrier Lock shows “SIM locked” or a carrier name instead of “No SIM restrictions”
- Outdated iOS — older software versions have known eSIM provisioning bugs
- No Wi-Fi during download — the profile download fails silently without a stable connection; Apple recommends Wi-Fi as the baseline for all eSIM setups
- Consumed QR code — most travel eSIM QR codes are single-use; scanning a used code produces an “Invalid” or activation error, and the provider must reissue it
- Too many eSIM profiles — iPhones support multiple stored profiles but have limits; an old unused profile can block a new one from installing
Carrier-side causes (require waiting or a support call):
- Provisioning delays on a new plan or number transfer
- Account flags or SIM Protection enabled on your account
- eSIM consumption flag not cleared after a failed attempt
Pro Tip: Before you call anyone, screenshot the exact error message and note the time it appeared. Carriers and providers can cross-reference that against server logs, which cuts support time significantly.
Quick checks you can run right now
Run these in order. Most people find their fix somewhere in steps 1–4.
- Confirm Carrier Lock status. Go to Settings > General > About > Carrier Lock. If it doesn’t say “No SIM restrictions,” stop here and contact your current carrier to unlock the device before proceeding.
- Connect to strong Wi-Fi. Move to a reliable network. Airport or hotel Wi-Fi with captive portals (login screens) can silently block profile downloads.
- Update iOS. Settings > General > Software Update. Install anything pending and restart.
- Update carrier settings. Go to Settings > General > About. If a carrier update is available, a prompt appears automatically. Tap “Update.”
- Toggle Airplane Mode. Swipe into Control Center, enable Airplane Mode for 30 seconds, then disable it.
- Restart the device. A full power-off restart, not just a lock-screen press.
- Toggle the eSIM line. Settings > Cellular > tap the eSIM line > toggle it off, wait 10 seconds, toggle back on.
Pro Tip: QR codes for travel eSIMs are almost always single-use. If you scanned the code and the activation failed, do not scan it again — the system may have already marked it as claimed. The provider must reissue a new code before you can try again.
If none of these work after one full pass, wait 15–30 minutes on Wi-Fi before moving to deeper troubleshooting. Provisioning delays are real and sometimes the fix is just time.
Step-by-step troubleshooting when quick fixes don’t work
Work through these in order. Skipping ahead wastes time and makes it harder to tell what actually fixed the problem.
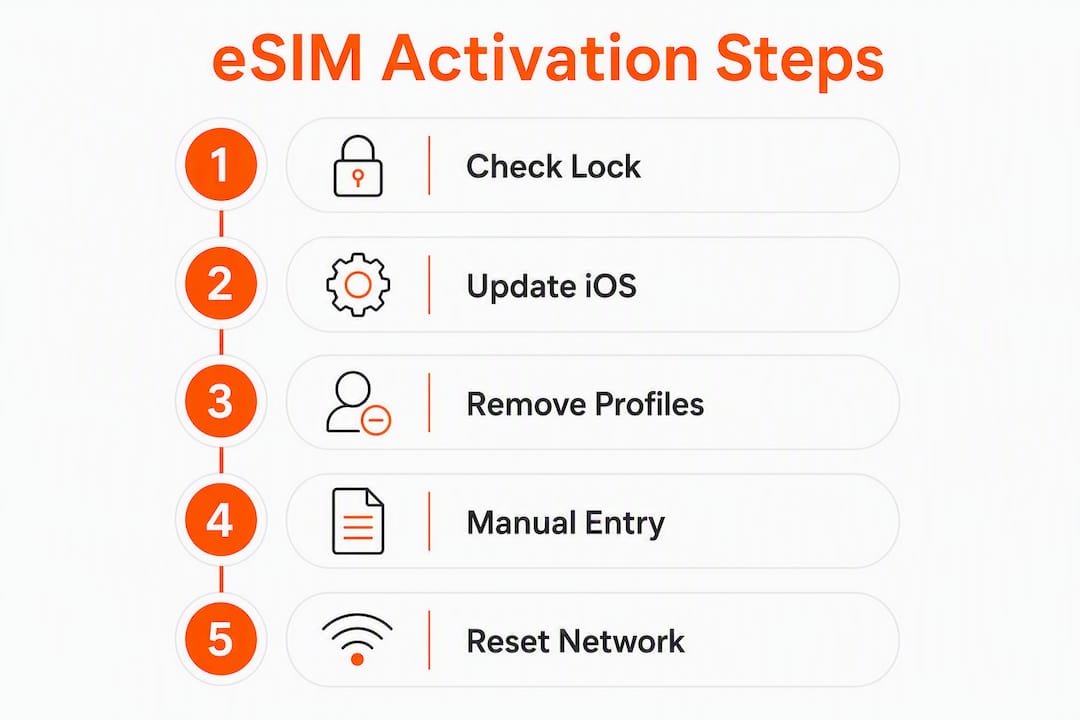
Step 1: Verify compatibility and unlock status
Check that your iPhone model supports eSIM (iPhone XS and later all do). Confirm Carrier Lock reads “No SIM restrictions.” If the device is locked, your current carrier must unlock it — this can take minutes to a few business days depending on the carrier and your account standing. There is no workaround.

Step 2: Update iOS and carrier settings, remove conflicting profiles
After updating (see quick checks above), go to Settings > Cellular and look for any old carrier profiles that might conflict. Removing a profile you no longer use can clear provisioning conflicts. If you’re mid-transfer from an old iPhone, keep both devices nearby with Bluetooth on — an interrupted Quick Transfer leaves both phones in a half-transferred state, and proximity lets the transfer resume.
Step 3: Try manual entry if the QR code fails
Every eSIM has a manual entry option: an SM-DP+ address and an activation code. Your provider’s confirmation email or account portal should list both. On iPhone: Settings > Cellular > Add eSIM > Use QR Code > Enter Details Manually. This bypasses QR scanning entirely and works when the QR image is damaged, expired, or already consumed.
Step 4: Reset network settings
Settings > General > Transfer or Reset iPhone > Reset > Reset Network Settings. This clears saved Wi-Fi passwords, VPN configurations, and APN settings — write those down first. After the reset, reconnect to Wi-Fi and retry the eSIM installation. For a deeper walkthrough of eSIM connectivity fixes on Apple devices, Lumo’s guide covers device-specific variations.
Before contacting support, collect these identifiers:
- IMEI — Settings > General > About, or dial *#06#
- EID — Settings > General > About > EID (scroll down)
- ICCID — visible in Settings > Cellular after a profile installs, even partially
- Order number from your eSIM provider
- Exact error message and the time it appeared
What to do when you’re stuck in an “Activating…” loop
The spinning “Activating” screen means the profile downloaded successfully but the carrier’s provisioning handshake hasn’t completed. The device is waiting for the carrier’s server to confirm the line.
- Wait 15–30 minutes on Wi-Fi before touching anything. Provisioning and number transfers legitimately take time, and interrupting the process can extend the delay.
- After waiting, run: Airplane Mode toggle → line off/on → full restart, in that order.
- Still stuck after an hour? The issue is almost certainly server-side. Contact your provider with your order number, EID, and a screenshot of the activation screen.
- Providers can re-push or reissue a profile from their end. Ask specifically: “Can you re-push the eSIM profile to my EID?” That’s the fastest resolution path.
- If the carrier confirms no server issue on their end, Apple recommends trying activation later and, if it persists, restoring via a computer as a final step.
Why does your eSIM show active but have no service?
“No Service” after a successful activation is almost always a settings issue, not a broken eSIM. Don’t assume the eSIM failed — check these first:
- Wrong active line for data. Settings > Cellular > Cellular Data — confirm the eSIM line is selected, not your physical SIM.
- Data Roaming is off. Travel eSIMs require roaming to be enabled because they technically connect through a foreign network. Settings > Cellular > tap the eSIM line > enable Data Roaming.
- APN not configured. Some carriers require a manual APN entry. Your provider’s confirmation email should include APN settings if needed.
- Plan not yet provisioned. The profile can install before the plan is actually active on the carrier’s backend. Wait 15–30 minutes and try again.
- Wrong line set for voice. Settings > Cellular > Default Voice Line — set it to the line you want active.
While waiting for provisioning, avoiding roaming fees is easier when you understand which line handles which traffic. Wi-Fi calling on your primary line is a solid fallback in the meantime.
Carrier-side problems that look like device faults
Some activation blocks have nothing to do with your phone. Carrier support pages map specific error codes to account-level issues — error codes in the 511–540 range on iPhone often point to transfer problems or account flags, not hardware.
Common carrier-side causes:
- SIM Protection enabled on your account (blocks eSIM changes as a fraud-prevention measure)
- Account in arrears or suspended
- Number transfer (port-in) still processing
- eSIM consumption flag not cleared after a failed first attempt
What to ask when you call:
- “Can you confirm my account is in good standing and has no SIM Protection or security holds?”
- “Can you clear the eSIM consumption flag on my line?”
- “What is my device’s unlock status, and if it’s locked, what’s the estimated unlock time?”
- “Can you re-push the eSIM profile to EID [your EID]?”
Have your IMEI, EID, ICCID, and order number ready before the call. Carriers can’t do much without them, and having them ready cuts the call time in half.
Activation problems that happen while traveling
Location matters more than most people realize. Some eSIM plans are destination-locked and require the first connection to happen in-country. Others activate immediately from anywhere. Knowing which type you have before you board prevents a lot of airport stress.
The golden rule: install the eSIM profile at home on stable Wi-Fi before you travel, even if you don’t activate the plan until you land. Airport Wi-Fi is unreliable, captive portals block profile downloads, and you don’t want to troubleshoot this at the gate.
Pre-travel checklist:
- Confirm your device is unlocked (Carrier Lock = “No SIM restrictions”)
- Install the eSIM profile while on home Wi-Fi
- Enable Data Roaming for the travel eSIM line
- Save your provider’s order number and support contact offline
- Keep a fallback option: a physical SIM or a secondary travel eSIM
Pro Tip: Set up your travel eSIM before departure — not at the airport. If the profile fails to download in transit, you’ll have no connectivity to contact support.
When factory reset is the right call
A factory reset is a last resort, not a first response. Use it only after you’ve confirmed with your carrier that the issue isn’t server-side, exhausted all troubleshooting steps, and still can’t activate.
- Back up first. iCloud backup: Settings > [Your Name] > iCloud > iCloud Backup > Back Up Now. Or connect to a Mac/PC and back up via Finder or iTunes.
- Record all identifiers. Write down IMEI, EID, ICCID, and your provider’s order number before wiping anything.
- Try “Erase All Content and Settings” first. Settings > General > Transfer or Reset iPhone > Erase All Content and Settings. This is less destructive than a full restore and often clears persistent activation errors.
- If that fails, restore via Finder or iTunes. Connect to a Mac (Finder) or PC (iTunes), put the iPhone in recovery mode (power + volume sequence varies by model), and select Restore. This reinstalls iOS from scratch.
- After restore, set up as new (not from backup) and retry eSIM activation before restoring your data. Restoring from a backup can re-introduce the same configuration issue.
If the problem persists after a clean restore, the issue is hardware or carrier-side. At that point, a professional device diagnostic can rule out hardware faults before you spend more time on software fixes.
What to look for when buying a prepaid eSIM
If your current carrier’s activation process has been a repeated headache, a prepaid eSIM provider with instant activation is worth considering. The buying checklist matters:
- Country coverage — confirm the destination is supported before purchasing
Lumo covers 160+ countries with instant QR code activation, provides both QR and manual entry options, and offers 24/7 customer support. For travelers who’ve dealt with provisioning delays from traditional carriers, the instant activation model means a failed QR gets reissued fast rather than waiting on a carrier’s business hours.
Key Takeaways
Most eSIM activation failures trace back to a carrier-locked device, missing Wi-Fi, or outdated iOS — fix those three first, and the rest of the troubleshooting flow becomes much shorter.
| Point | Details |
|---|---|
| Check Carrier Lock first | Settings > General > About > Carrier Lock must read “No SIM restrictions” before any eSIM will install. |
| Wi-Fi and iOS updates are prerequisites | Connect to stable Wi-Fi and install pending iOS and carrier settings updates before retrying activation. |
| QR codes are single-use | A consumed QR code must be reissued by the provider — rescanning it won’t help. |
| Wait 15–30 minutes for provisioning | Activation loops are often server-side delays; wait before escalating, then contact support with IMEI, EID, and order number. |
| Lumo for instant activation | Lumo’s prepaid eSIM plans cover 160+ countries with instant QR activation and 24/7 support for fast reissues. |
The part most troubleshooting guides skip
There’s a pattern worth naming: most people who contact carrier support for eSIM activation problems have already spent an hour on the wrong fix. They’ve reset network settings twice, deleted and re-added profiles, and restarted the phone four times — but they never checked Carrier Lock. The phone was locked the entire time.
The prioritized flow in this guide exists because order matters. Carrier Lock is a hard blocker. No amount of toggling Airplane Mode fixes a locked device. The same logic applies to Wi-Fi: a profile that fails to download on a captive-portal network will fail every time, regardless of iOS version.
The other thing guides underplay is the single-use QR issue. Rescanning a consumed code doesn’t just fail — it can trigger additional error flags on the provider’s system, making the reissue process slower. Stop at one scan, contact the provider, and ask for a fresh code.
For travelers specifically, the install-at-home rule is the single highest-leverage habit. An eSIM profile installed on home Wi-Fi before departure means you land with a working profile ready to activate, not a download that needs to happen on airport Wi-Fi at 11 PM.
Official resources and troubleshooting pages
When you need to go deeper or verify carrier-specific guidance, these are the pages worth bookmarking:
- Apple Support: If you can’t set up an eSIM on your iPhone — step-by-step Apple guidance, including carrier settings update instructions and activation server troubleshooting
- Apple Support: If you can’t activate your iPhone or iPad — covers restore via computer and recovery mode for persistent activation server errors
- Apple Support: If Dual SIM with eSIM isn’t working — specific guidance for dual-SIM setups and eSIM conflicts on iPhone XS and later
- Lumo eSIM troubleshooting guide — extended diagnostics for connectivity and activation problems across devices
Lumo gets you connected without the carrier runaround
Carrier activation delays and locked-device headaches are the two most common reasons travelers end up stuck without service. Lumo’s prepaid eSIM plans are built around neither of those problems: no carrier lock required, no waiting on provisioning queues, and no business-hours-only support when you’re in a different time zone.
You get instant QR code activation, coverage across 160+ destinations, flexible data plans with no contracts, and 24/7 support that can reissue a QR code in minutes if the first scan fails. The manual SM-DP+ entry option is always available as a backup. For anyone who’s just spent an hour troubleshooting a carrier’s activation system, that’s a meaningful difference.
Browse Lumo’s global eSIM plans and check coverage for your destination before your next trip.
FAQ
Why won’t my iPhone let me activate an eSIM?
The most common reason is a carrier-locked device. Check Settings > General > About > Carrier Lock — if it doesn’t read “No SIM restrictions,” your phone will reject eSIMs from other carriers until unlocked.
Is it normal for eSIM activation to be stuck on “Activating”?
Yes, briefly. Travel eSIM profiles usually activate in under a minute, but provisioning and number transfers can take 15–30 minutes. Wait on Wi-Fi, then toggle Airplane Mode and restart if it’s still spinning after that window.
Why do I have no service after my eSIM activated?
Check that the eSIM line is selected under Settings > Cellular > Cellular Data, and that Data Roaming is enabled for that line. Travel eSIMs require roaming on by default, and the wrong active line is the most common cause of post-activation “No Service.”
Does eSIM activation typically take 24 hours?
No. Most activations complete in minutes. A 24-hour delay usually signals a carrier-side provisioning issue or a number transfer in progress. Contact your provider with your EID and order number if activation hasn’t completed within a few hours.
Recommended
- How to Troubleshoot eSIM Connectivity Issues Fast | Lumo eSIM Store
- Step-by-step eSIM activation guide for seamless global connectivity 2026 | Lumo eSIM Store
- QR Code Activation: Simplifying Global eSIM Setup | Lumo eSIM Store
- Instant eSIM Activation: Global Connectivity Simplified | Lumo eSIM Store
Related Topics
Stay Connected Anywhere
Get instant eSIM data plans for 160+ countries. No physical SIM required.