8 Surface Pro models that support eSIM, with Device Manager fixes

eSIM works on Surface Pro only if you bought the LTE or 5G configuration. Surface Pro X, Surface Pro 7+, Surface Pro 8, Surface Pro 9, Surface Pro 10 for Business, Surface Pro (11th Edition), and Surface Pro 5G for Business (12th Edition) all support it in their cellular SKUs. The fastest confirmation: open Settings > Network & internet and look for “Cellular.” If it’s not there, your device likely shipped Wi-Fi only. Full setup and troubleshooting steps follow below.
TL;DR:
- Only Surface Pro models with LTE or 5G configurations support eSIM, and Wi-Fi-only SKUs lack the necessary hardware, making software updates impossible to add cellular functionality.
- Activation requires a cellular-capable SKU, a Wi-Fi connection for profile download, and either a QR code or carrier details in the Mobile Plans app; the process typically takes under a minute.
- Most setup issues stem from missing hardware or driver problems, with solutions including Windows Updates, driver reinstallation, and reseating the nanoSIM tray if present.
- Carrier support varies by region and plan, so confirming network compatibility before purchase is essential, especially for roaming or travel plans, which may incur higher costs.
- Testing with small, short-duration data plans from providers like Lumo can verify hardware and carrier activation before committing to more expensive or long-term plans.
Table of Contents
- Surface Pro eSIM Compatibility by Model
- How to Add and Activate an eSIM Profile on Surface Pro
- Fixing Common eSIM Errors on Surface Pro
- Checking Your Modem and Hardware Details
- Carrier Coverage, Roaming, and Getting Reliable Data
- Why Compatibility Confusion Persists on Surface Pro
- Author and Brand Credibility
- What the Setup Process Actually Reveals
- Get Your Surface Pro Online With Lumo
- Sources
- FAQ
Surface Pro eSIM Compatibility by Model
Not every Surface Pro sold has cellular hardware. Microsoft only builds eSIM support into specific SKUs, and once you own a Wi-Fi-only unit, there’s no driver update or software patch that adds it. The modem is a physical chip soldered to the board. If it isn’t there, it isn’t happening.
Here’s the complete list of Surface devices Microsoft has confirmed with LTE Advanced or 5G modems capable of eSIM:
- Surface Pro X — Microsoft’s ARM-based Pro X shipped with a Snapdragon-based modem and eSIM support standard on cellular models.
- Surface Pro (5th Gen) with LTE Advanced — an early adopter of built-in cellular, predating the more common eSIM-plus-nanoSIM combo.
- Surface Pro 7+ with LTE Advanced — popular in education and enterprise deployments where a permanent data connection mattered more than battery life.
- Surface Pro 8 with LTE Advanced — carried the cellular option forward with a refreshed chassis.
- Surface Pro 9 with 5G — the first Surface Pro to bring true 5G speeds, using a Qualcomm SDX55 modem.
- Surface Pro 10 for Business (5G) — an enterprise-only SKU sold through commercial channels.
- Surface Pro (11th Edition) with 5G — Microsoft’s current-generation ARM Copilot+ PC lineup with cellular built-in.
- Surface Pro 5G for Business (12th Edition) — the latest commercial cellular configuration.
For context, Microsoft’s own device compatibility notes also list Surface Laptop 5G for Business and several Surface Go LTE models as eSIM capable, so the feature isn’t exclusive to the Pro line.
The distinction that trips people up is that “Surface Pro” isn’t one product. It’s a chassis sold in multiple internal configurations, and only the LTE or 5G build has the antenna array and modem chip needed for cellular data at all. A Wi-Fi-only Surface Pro 9 and a 5G Surface Pro 9 look identical from the outside. Open the Surface app, go to “Device information,” and check the model name against Microsoft’s spec pages. If your listing doesn’t mention LTE Advanced or 5G anywhere, eSIM is off the table permanently, not just unconfigured.
How to Add and Activate an eSIM Profile on Surface Pro
Before touching any settings, confirm three things: your Surface Pro is one of the cellular SKUs listed above, you’re connected to Wi-Fi, and you have either a QR code from your carrier or an active plan ready to activate through the Mobile Plans app. The download itself needs an internet connection, which feels backward the first time you do it, but the eSIM profile is a data file, not a physical chip, so it has to arrive over some network before cellular even works.
Here’s the process, start to finish:
- Connect to Wi-Fi. The profile download requires internet access; you cannot pull it in over cellular because there’s no cellular connection yet.
- Open Settings > Network & internet > Cellular. If your device is eSIM capable, you’ll see an option to manage or add a profile.
- Select “Add a new plan” or “Manage eSIM profiles.” Windows will prompt you to either scan a QR code or enter carrier details manually.
- Scan the QR code your carrier provided, or tap “Enter details manually” if you have an activation code, SM-DP+ address, and confirmation code instead.
- Wait for the profile to download and install. This typically takes under a minute on a stable connection, though first-time activations sometimes take a few minutes longer while the carrier’s server validates the request.
- Alternatively, open the Mobile Plans app and browse available data plans directly, which some carriers support for instant, in-app purchase and activation without a QR code at all.
- Set your data preferences. Once the profile installs, Windows lets you choose which network (Wi-Fi or cellular) to prioritize, and whether to let apps use cellular data in the background.
Microsoft’s own guidance walks through this same Settings > Network & internet > Cellular flow for adding a profile by QR code or through the Mobile Plans app, and it’s worth bookmarking if you’re setting up more than one device.
If you’re switching between a personal and a work profile, or between two countries on a trip, Windows can hold multiple eSIM profiles at once. You just can’t have two of them active for cellular data simultaneously. Go back into Cellular settings and tap the profile you want live; the previous one stays installed but idle until you switch back.
Pro Tip: Save a screenshot or PDF of your carrier’s QR code before you start. Surface cameras aren’t always great in low light, and if the scan keeps failing, pulling the same code up on your phone screen and re-scanning from there often works when scanning off a printed page or another laptop screen doesn’t.
Fixing Common eSIM Errors on Surface Pro
Most eSIM problems on Surface Pro trace back to one of three things: missing hardware, outdated drivers, or a carrier-side account issue. Work through them in that order, because chasing a driver fix on a Wi-Fi-only device wastes time you don’t have.
Start here if “Cellular” doesn’t appear in Settings at all. Open the Surface app and check “Device information” to confirm your exact model. If it doesn’t list LTE Advanced or 5G, the missing setting isn’t a bug. It’s a hardware limitation, and no update will add cellular support to a Wi-Fi-only board.
If your device is confirmed cellular-capable but still shows “Cellular” missing or reports “no hardware present” during activation, work through these in order:
- Run Windows Update and install everything pending, including optional driver updates, since Surface modem firmware often ships through that channel rather than the modem manufacturer directly.
- Open Device Manager, expand “Network adapters,” and look for a Surface-specific modem entry. If it’s missing, grade out, or shows a warning icon, that’s your problem.
- Right-click the modem entry and choose “Update driver,” or uninstall and let Windows reinstall it on the next restart.
- Reboot fully rather than just signing out. Modem firmware sometimes needs a full power cycle to re-initialize after an update.
- If your Surface has a physical nanoSIM tray as a backup option, reseat it even if you’re planning to use eSIM. A poorly seated tray has been known to interfere with the modem’s initialization sequence.
Microsoft’s own troubleshooting page for Surface cellular issues recommends this same Device Manager check and Windows Update sequence before escalating to support, and it’s the first thing a support agent will ask if you do end up calling in.
If the hardware and drivers check out but activation still fails, the issue usually sits on the carrier’s side. Confirm your data plan is active (not just purchased), check that APN settings match what your carrier specifies, and watch for a “Mobile operator locked” message, which means the eSIM profile is tied to a specific carrier and won’t accept a different one. Roaming toggles also block data silently if you’re outside your home network’s registered coverage area.
A meaningful share of eSIM activation failures on Windows trace back to missing MBIM or CID support in an outdated modem driver rather than anything wrong with the carrier profile itself, according to Microsoft’s driver documentation for eSIM operations. That’s why the driver update step above isn’t optional busywork. It fixes more activation failures than any other single step.
If none of this resolves it, contact Microsoft Support or your carrier with three specifics ready: the exact modem name from Device Manager, your current Windows build number (Settings > System > About), and a screenshot of the error message. That trio cuts diagnosis time dramatically compared to a vague “eSIM isn’t working” call.
Checking Your Modem and Hardware Details
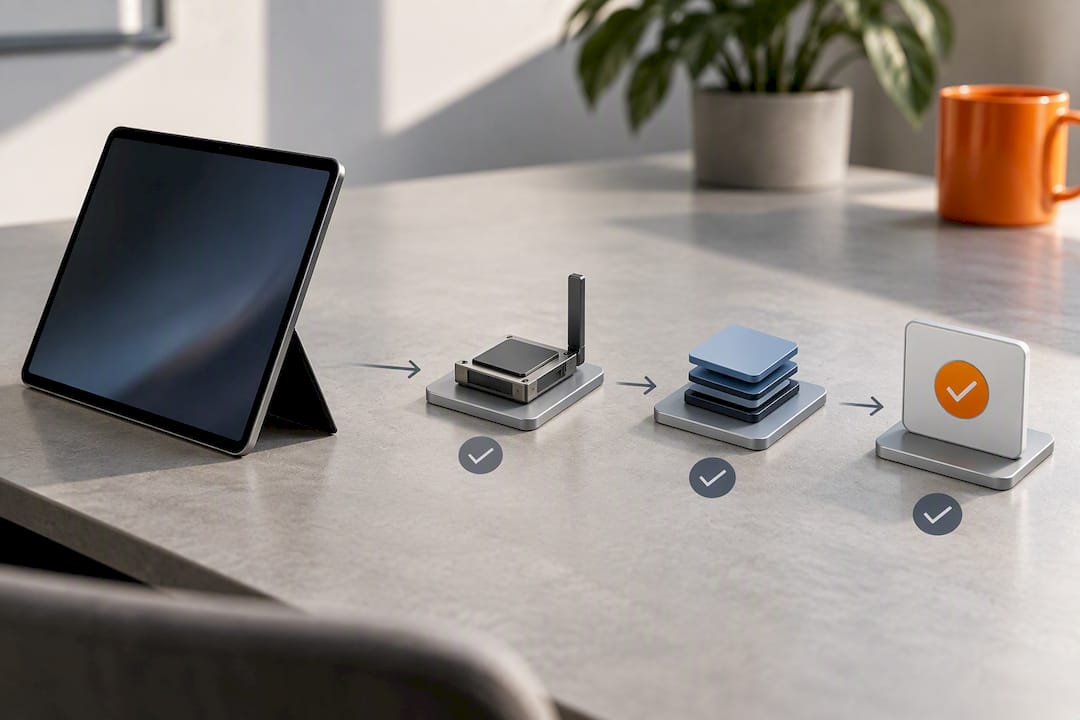
Before assuming a setup problem, spend two minutes confirming what hardware you’re actually working with. This step alone resolves a surprising number of “why doesn’t eSIM work” questions, because a lot of them turn out to be a Wi-Fi-only unit someone assumed was cellular.
Three places to check, in order of speed:
- Surface app → Device information. This shows your exact model name and SKU. If “LTE Advanced” or “5G” isn’t in that name, cellular hardware isn’t present.
- Settings > Network & internet. If “Cellular” appears as an option here at all, the hardware exists. If it’s absent on a confirmed cellular SKU, move to driver troubleshooting.
- Device Manager → Network adapters. This is where you identify the specific modem chip. Microsoft’s support documentation names four adapter entries you’re likely to see: “Surface 5G Mobile Broadband” or “SDX55 5G Modem NetAdapter” on Surface Pro 9 and newer 5G models, “Snapdragon x24 LTE modem” on Surface Pro X, and “Surface Mobile Broadband” on Pro 7+ and Pro 8 with LTE Advanced.
If the adapter entry shows a yellow warning triangle or says “no drivers installed,” that’s a software fix, not a hardware failure. If there’s no modem entry at all on a device you’re certain is a cellular SKU, that points toward a firmware issue serious enough to warrant a support call rather than another driver reinstall.
Status messages matter too. “Mobile operator locked” means the eSIM profile itself is carrier-restricted, not a device problem. “No hardware present” on a confirmed cellular SKU almost always means a driver didn’t load correctly after an update, which is exactly the failure mode the Device Manager check above is built to catch.
Carrier Coverage, Roaming, and Getting Reliable Data
Having eSIM-capable hardware doesn’t guarantee your carrier will actually activate one on your specific Surface Pro. Coverage and eSIM support are carrier decisions, not Microsoft’s, and they vary by country, by network, and sometimes by plan tier within the same carrier. Microsoft’s own FAQ on cellular data for Surface devices is blunt about this: verify with your operator before you buy anything, because a device being technically compatible with eSIM doesn’t mean every carrier’s network will honor that profile in your region.
You’ve generally got two paths to a working profile: your home carrier’s own eSIM offering, or the Mobile Plans app built into Windows, which lets some carriers sell and activate a plan directly on the device without a separate QR code step. The app is convenient for domestic data, but it’s carrier-dependent inventory. This means not every operator lists a plan there, and pricing skews toward standard consumer rates rather than short-term travel deals.
A few habits keep eSIM on Surface Pro running smoothly:
- Keep Windows fully updated; modem firmware fixes ship through Windows Update more often than through a separate installer.
- Test any new eSIM plan while you still have Wi-Fi as a fallback, in case activation needs a retry.
- For travel, prefer short-duration prepaid plans over your home carrier’s roaming add-on, since roaming rates on a postpaid plan are almost always the more expensive option.
- If you manage several devices at once, enterprise IT teams can push eSIM profiles through Intune, cutting individual activation steps for large Surface deployments.
Pro Tip: If you’re carrying two active profiles, one home and one travel, check your data usage under Settings > Network & internet > Data usage before you leave and again mid-trip. Toggling to the wrong profile without noticing is the single most common way people rack up a surprise roaming bill on an otherwise properly configured Surface Pro.
Why Compatibility Confusion Persists on Surface Pro
Most of the confusion around Surface Pro eSIM traces to Microsoft selling one product name across wildly different internal configurations for nearly a decade. That’s not a criticism of the hardware. It’s a naming problem, and it’s the reason forum threads are full of people asking why their “Surface Pro” won’t show a Cellular option when the answer is simply that their unit never had a modem.
For setup and configuration steps, our step-by-step activation walkthrough covers the same core flow across Windows devices generally, and it’s worth reading if you manage more than one eSIM-capable machine.
Author and Brand Credibility
This guide draws on Microsoft’s own device compatibility lists, Support troubleshooting documentation, and Windows driver references for eSIM operations, cross-checked against real Surface Pro configurations across multiple generations. Theo Wheeler covers device connectivity and eSIM setup across Windows and mobile platforms for Lumo, with a focus on translating carrier-side technical requirements into steps a non-specialist can follow without guesswork.
Lumo provides eSIM plans that support multiple stored profiles per device and cover a wide range of countries, with activation involving a QR code scan, which can help when testing Surface Pro cellular functionality for the first time.
What the Setup Process Actually Reveals
The technical part of Surface Pro eSIM setup is genuinely simple once you clear the hardware confusion out of the way. Scan a code, wait a minute, done. What conventional advice gets wrong is treating every activation failure like a software problem first. In practice, the split runs roughly even between genuine driver issues and people troubleshooting a Wi-Fi-only unit that was never going to work.
Check your exact SKU before you do anything else. Five minutes in the Surface app saves an hour of driver reinstalls that were never going to fix a missing modem.
The other thing worth saying plainly: buy the smallest, cheapest eSIM plan you can find the first time you test a new device. Not because anything is likely to go wrong, but because a $5 test run tells you everything a $50 postpaid plan would, at a tenth of the risk if your specific carrier combination turns out to be finicky. Once you know activation works, scale up to whatever plan actually fits your usage.
— Theo Wheeler
Get Your Surface Pro Online With Lumo
Lumo offers a convenient way to purchase eSIM data plans and activate them easily on eSIM-capable Surface Pro devices, allowing users to get online quickly without needing a physical SIM or contracts.
If you’re testing eSIM on a Surface Pro for the first time, start small. A short-duration, low-data plan confirms your specific hardware and carrier combination actually activates cleanly, and you can always add more data once you know it works. Lumo’s Global eSIM Plans cover more than 160 countries for travel and testing alike, while the United States eSIM Plans work well for domestic data if you just need a backup connection at home. Browse the full range of options at Lumo and pick the plan that fits your Surface Pro’s next trip.
FAQ
Can You Put a SIM Card in a Microsoft Surface Pro?
Only on cellular SKUs. Several Surface Pro generations, including Pro 7+ and Pro 8 with LTE Advanced, include a physical nanoSIM tray alongside eSIM support, while Wi-Fi-only models have no SIM slot of any kind.
Can I Add an eSIM to Any Laptop?
No. eSIM requires a built-in cellular modem chip, so it only works on laptops sold with an LTE or 5G configuration; you cannot add the hardware to a Wi-Fi-only laptop after purchase. Once confirmed compatible, activation follows the same Settings > Network & internet > Cellular flow across Windows devices, including Surface Pro.
Which Laptops Support eSIM?
Beyond Surface Pro’s cellular SKUs, several Windows laptops from other manufacturers ship with built-in LTE or 5G modems and eSIM support, though availability varies by model and region. Check the specific model’s spec sheet for “LTE” or “5G” in the configuration name before assuming eSIM support.
Which Surface Models Have a SIM Card Slot?
Surface Pro (5th Gen), Pro 7+, and Pro 8 with LTE Advanced include a physical nanoSIM tray in addition to eSIM. Newer 5G models, including Surface Pro 9, Surface Pro 10 for Business, and the 11th and 12th Edition cellular SKUs, rely on eSIM only with no physical tray.
Why Doesn’t My Surface Pro Show a Cellular Option in Settings?
The most common reason is that the device is a Wi-Fi-only SKU without a cellular modem installed, which is a permanent hardware limitation rather than a setting to enable. If your model is confirmed cellular-capable, Microsoft recommends checking Device Manager for the modem driver and running Windows Update before assuming a deeper fault.
Recommended
Related Topics
Stay Connected Anywhere
Get instant eSIM data plans for 160+ countries. No physical SIM required.